
Starting an app over from scratch is a big-budget, long-term commitment that most teams can't justify.
But when Jetpack Compose, Android's biggest splash since Android 1.0, comes knocking at your door, sometimes a major refactor makes sense.
I know it because I've done it.
On a large scale.
If you've been thinking about migrating to Jetpack Compose and can't justify a full app rewrite, then this guide is for you.
Assumptions
There are countless ways to structure an app, so a few expectations need to be clarified to establish where we are starting and where we are going.
The "old" standard often contained a UI layer architecture similar to this from the outside in:
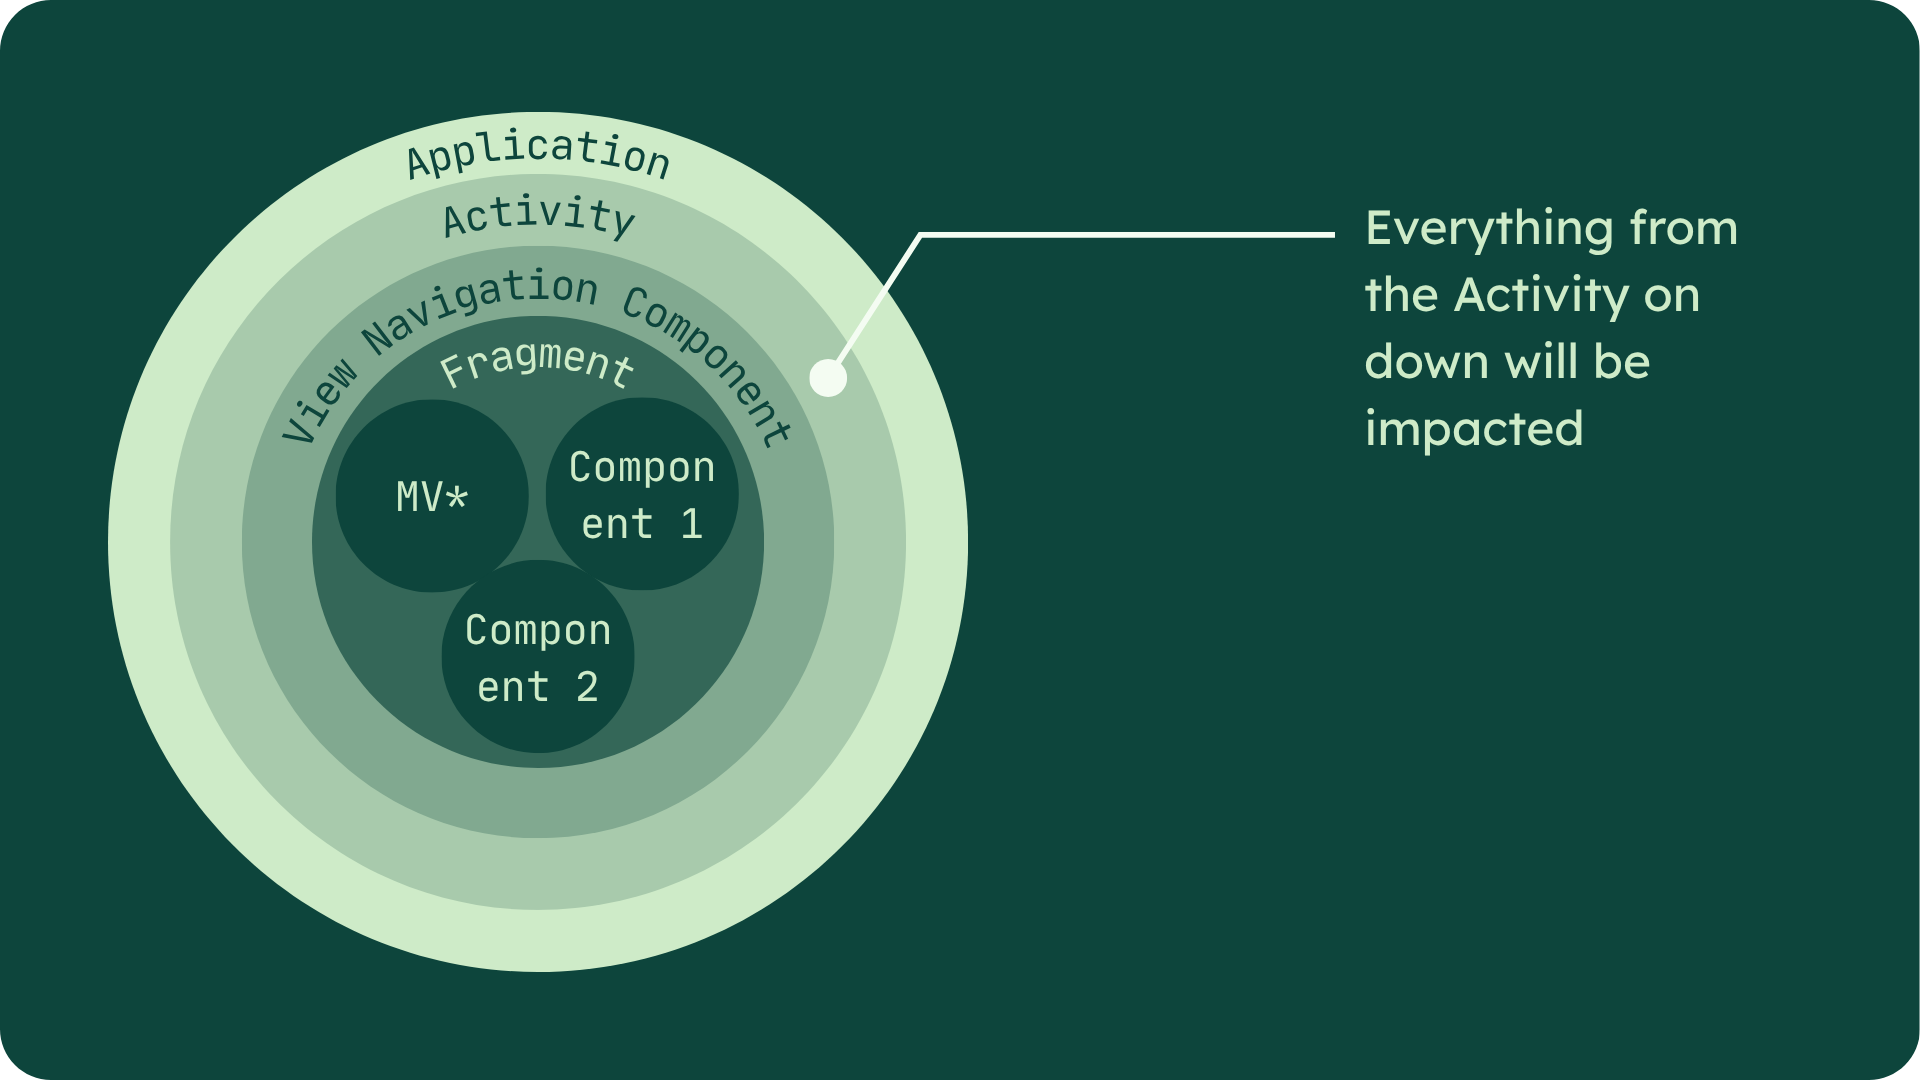
Even if your starting point slightly differs, you should be fine as long as you follow the Activity, Router, Fragment, MV* layering approach.
The Roadmap
Now that we know our starting point, let's see where we are going and what will change.

You'll notice that both the Application and Activity remain in place. However, the Activity changes and everything from there on down is largely replaced with Compose.
In general, here is the process to go from left to right:
- Pick a screen
- Replace your * (e.g., Controller or Presenter) in your MV* architecture with Android's first-class ViewModel
- Migrate only the reusable components to Compose
- Migrate the screen itself, but keep it inside a Fragment
- Repeat steps 1-4 for each Fragment in your router
- Uncouple chunks of your app from their containing Fragment, replacing them entirely with Compose only
- Replace the legacy router with Navigation Compose
- Migrate root-level UI on the enclosing Activity to Compose
- Repeat steps 1-8 for each Activity
This layered approach aims to preserve usability at every step, enabling you to continue shipping updates for your app throughout this migration.
It also works to contain the mess created by this refactor and keep it as localized as possible.
Why ViewModels?
I'm very specific with what the * in your MV* architecture should be: a ViewModel.
If you are already using Android's first-class ViewModel class for the logic of your presentation layer, then your job is done.
However, if you haven't, my reason is simple: ViewModels work extremely well with both XML Views and Compose.
They represent the latest approach Google recommends for your UI's logic, applicable to both generations of UI development.
This approach allows you to take the migration process in smaller bites, preserving the functionality of your existing UI for as long as possible until it is fully migrated to compose.
Here, you can work on just the logic in a single bite, call it a day, then come back later to adjust the UI. There's no need to big bang both at once.
In short, it makes the jump you need to take between the logic driving your Views and the logic driving Compose relatively small.
The Incubator
The Fragment and its containing router serve as a legacy incubator for our new code until every screen and component has been migrated. Only after that is it removed.
The process looks like this.
Dotted lines indicate an updated segment.
In this example, the app has 3 screens controlled by a single router.
Each screen is selected one at a time, where the ViewModel replaces any prior Controller or Presenter, and then each reusable XML component is replaced by a new composable, if necessary.
Only after all components related to the screen have been upgraded is the screen itself migrated.
This process repeats until all screens are written in compose. However, the Fragments remain as a container to allow you to continue using your legacy navigator.
Once all of the screens within that navigator are replaced, then the Fragments can be removed, and the router is also migrated.
How to Pick a Screen
This back-and-forth process of unwiring and rewiring is certainly disruptive. How can we choose our path carefully to ensure as little disruption and duplicated effort as possible?
Pick the screens that live at the leaves of your graph and work backward to the root. In other words, start with screens that don't have any child routes.
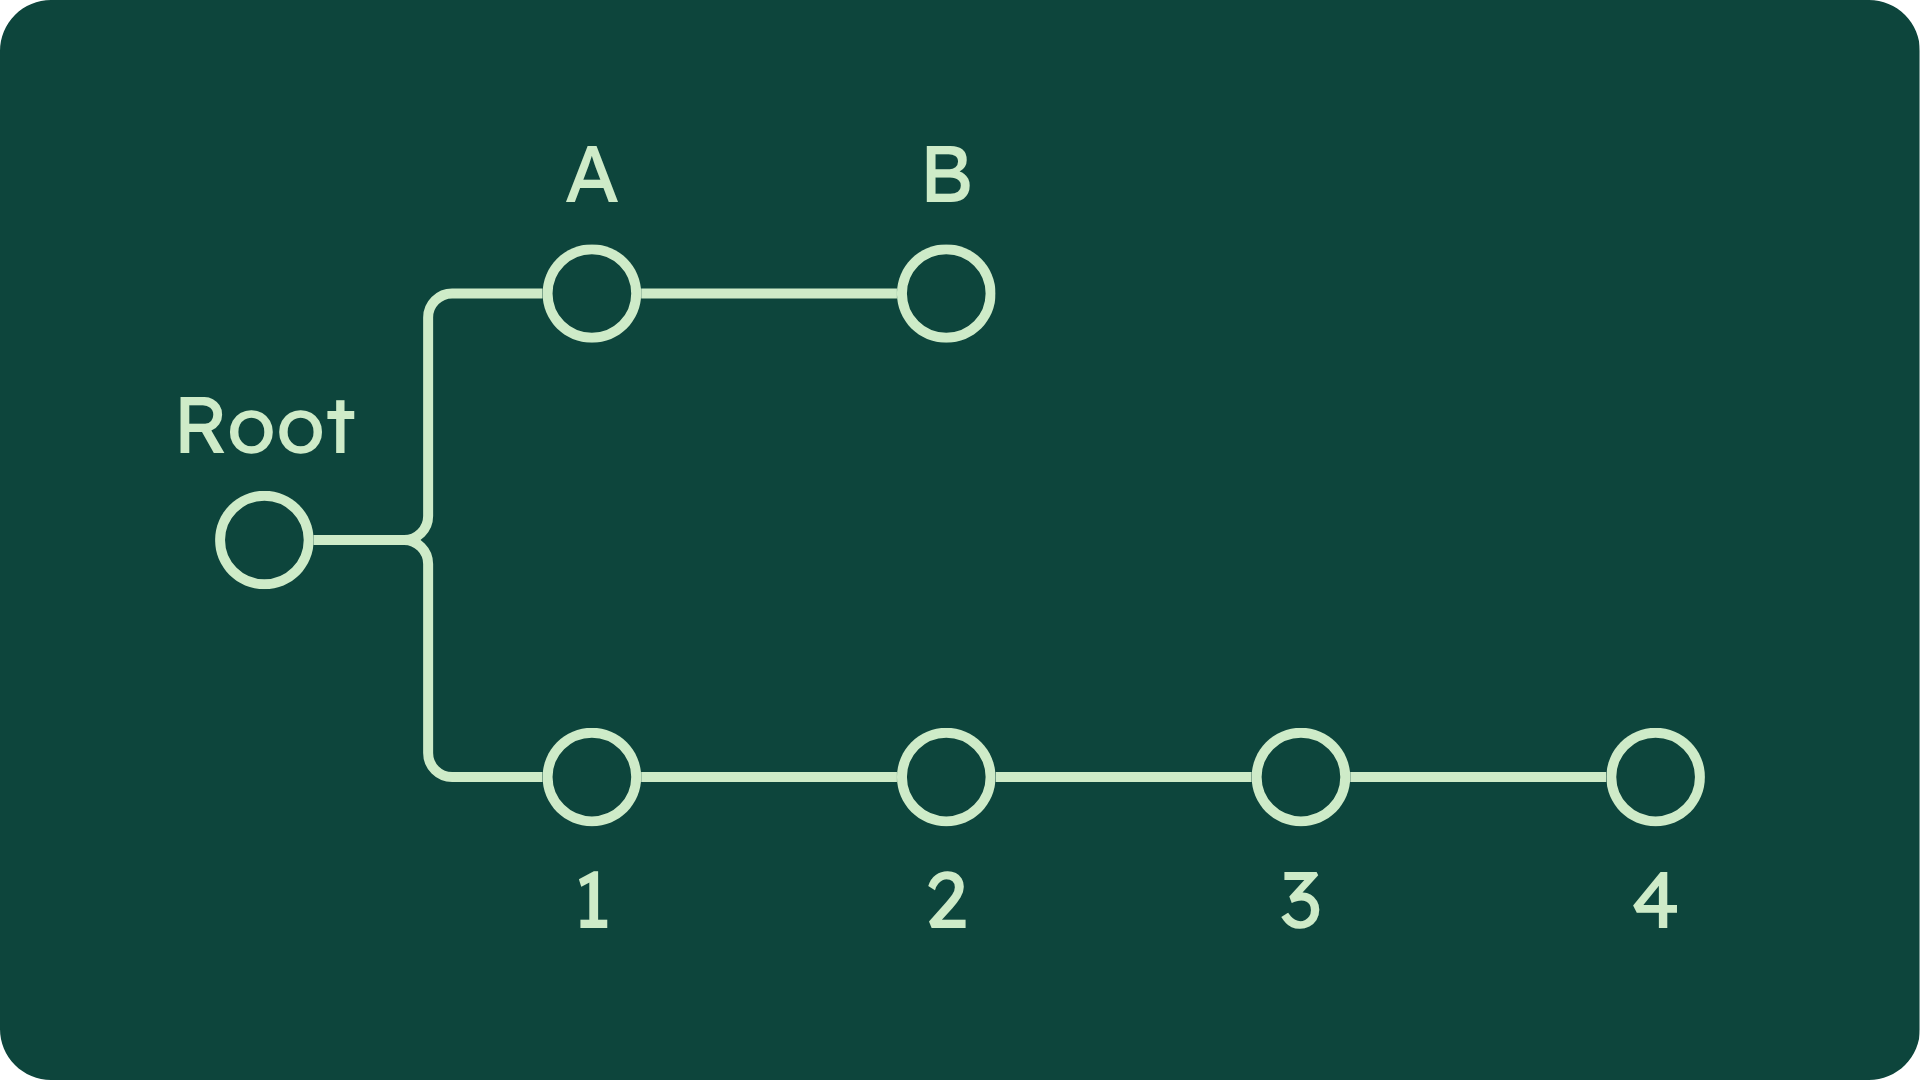
In the above example, we see a navigation graph for a simple app with two primary navigation paths.
B or 4 would be equally good screens to pick when starting a migration. Then you would work back towards the root one screen at a time.
Why?
Every screen you change has the potential to impact itself and its downstream routes.
You'll be touching routes.
You'll slightly modify business logic.
You'll have unexpected twists and turns.
Even though you try to isolate a much as possible.
Things still happen.
This inside-out approach is a way to minimize the mess in your workspace as much as possible for as long as possible.
The rest of this process is just a rinse-and-repeat of the technical application.
Import Jetpack Compose.
Migrate to ViewModels.
Start using Compose.
Migrate routers.
etc.
But that will be up to you.
We've covered the main gotchas and process framework that I've used over and over for this kind of migration.
Next time, we'll discuss the two cases when I recommend dependency injection.
That's all for this time,
Oliver from AndroidX.

Responses